Amplified has partnered with Twilio to provide you with top-notch SMS and MMS messaging capabilities. With Twilio, you can easily send text and multimedia messages to your customers and prospects all through one platform.
To get started with our SMS and MMS messaging service, you will need to sign up for a Twilio account if you don't already have one. Once your Twilio account has been set up, you can add the credentials to your Amplified account. Once the two accounts are connected, you'll be able to start sending SMS and MMS messages through our platform with your Twilio phone number.
Five quick and easy steps to set up your Twilio account
Step 1: Create your account
- Go to Twilio's Sign Up page and create an account.
- Twilio will send you a confirmation email. Open it and click “Verify Your Email”.
- On the verification screen, select your country, enter your phone number, and click "Verify."
- Enter the verification code sent to your phone number and click “Submit”.
- Answer the questions and click “Get Started with Twilio”.
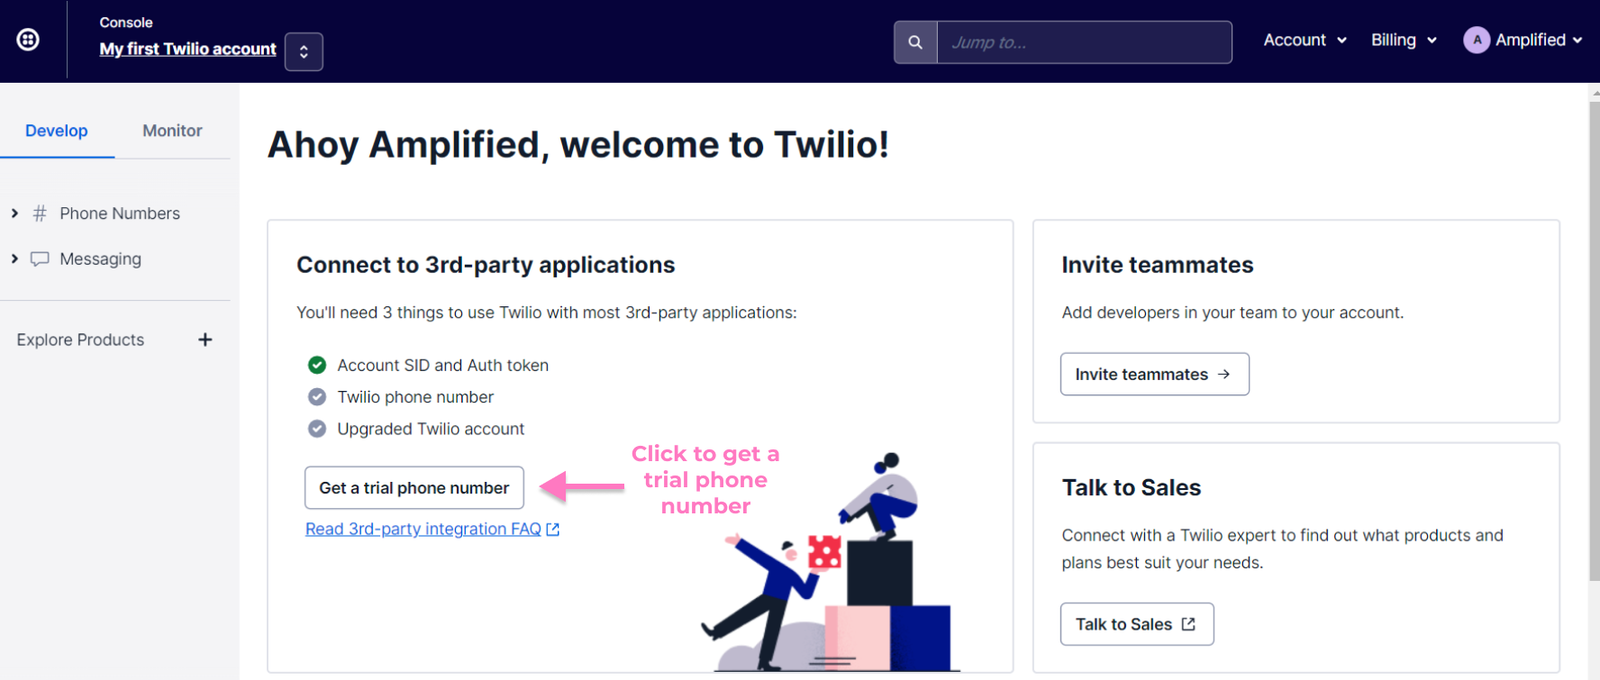
Step 2: Get a trial phone number or purchase a new number
Trial phone number:
- In your Twilio dashboard, select “Get a Trial Number”. It will automatically assign a US-based number.
Purchase a new number:
- In your Twilio console, go to Phone Numbers > Manage > Buy a Number
-
Enter your search criteria, and Twilio will display several numbers to choose from. Click “Buy” to purchase a phone number
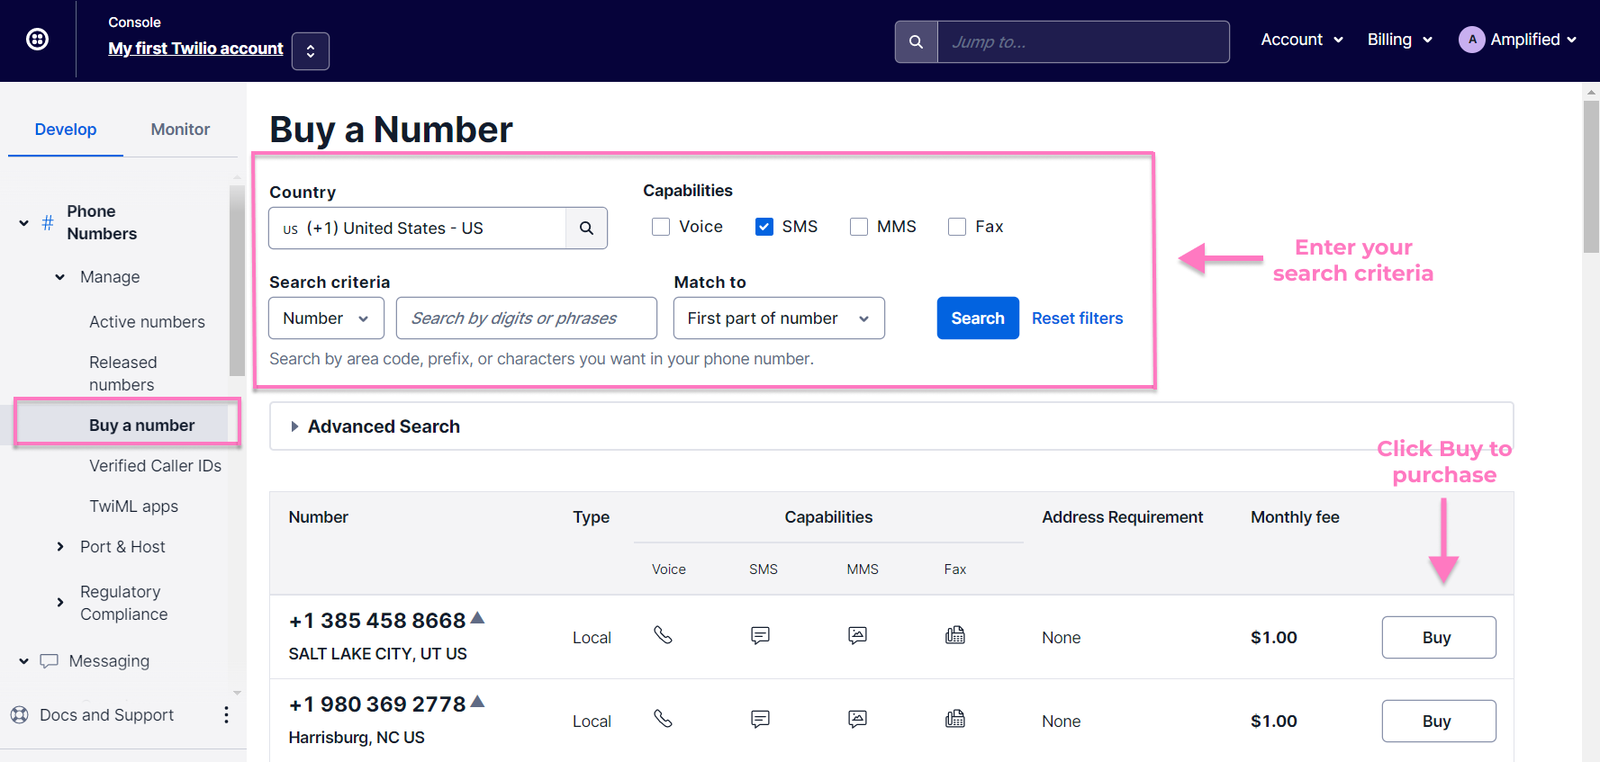
How to purchase a number
Step 3: Upgrade to a paid account
- In your Twilio console, select Billing from the top right menu and click "Upgrade".
- In the "Main Address" section, select the country where you'll use Twilio services. This information will be used for taxation purposes. When you are done adding your address, click “Continue”.
- On the "Tax Information" page, add your business tax number. Upon completion, click “Continue”.
- Fund your account. Select how much you'd like to start your account balance with. We highly recommend enabling Automatic Recharge to automatically charge your payment source and refill your balance when it falls below the specified amount. It is important to ensure your account is always funded to ensure the proper delivery of SMS. Click “Continue” when you're finished setting it up.
-
Select your desired payment method to charge your account. When ready, click on “Confirm Payment”.
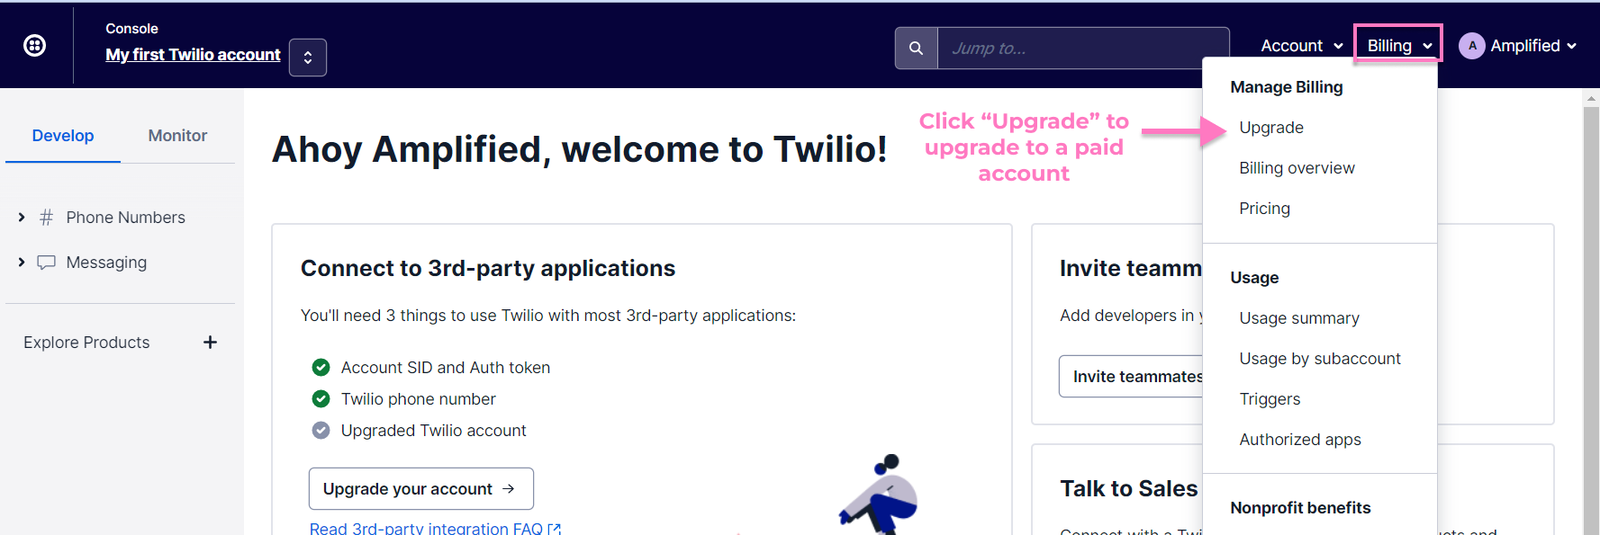
How to upgrade your account
Step 4: Set Geo Permissions
Geographic permissions allow you to ensure that you only send SMS messages to the countries you operate in and avoid unexpected costs. You can disable numbers from certain countries from receiving text messages from your Twilio account. To do this:
- In your Twilio console, go to Messaging > Settings > Geo Permissions
-
Make sure you select the countries you want to target or that may receive an SMS from you.
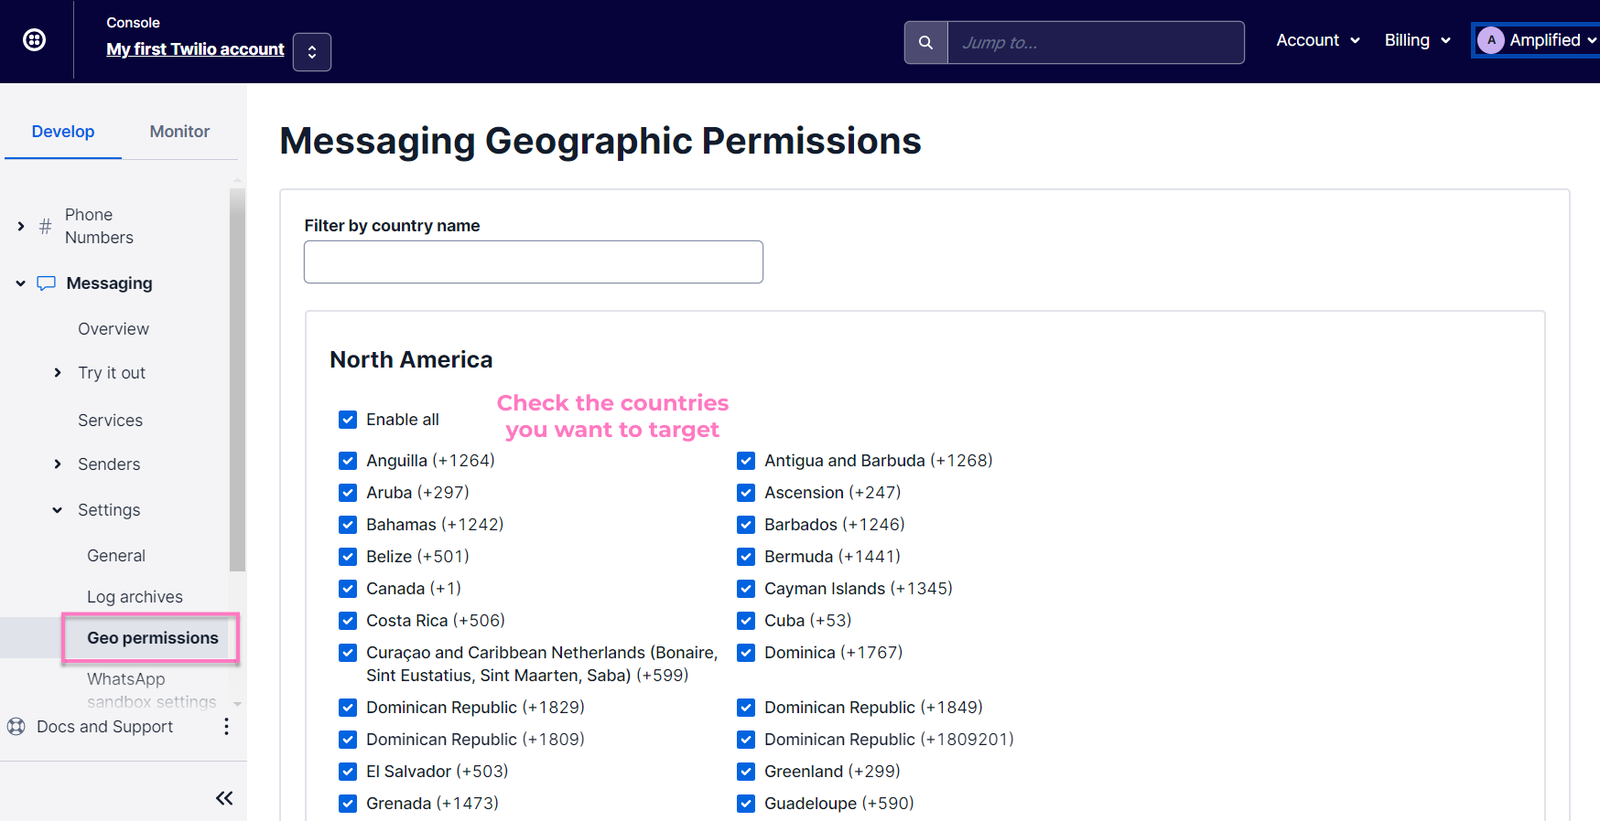
How to set geo permissions
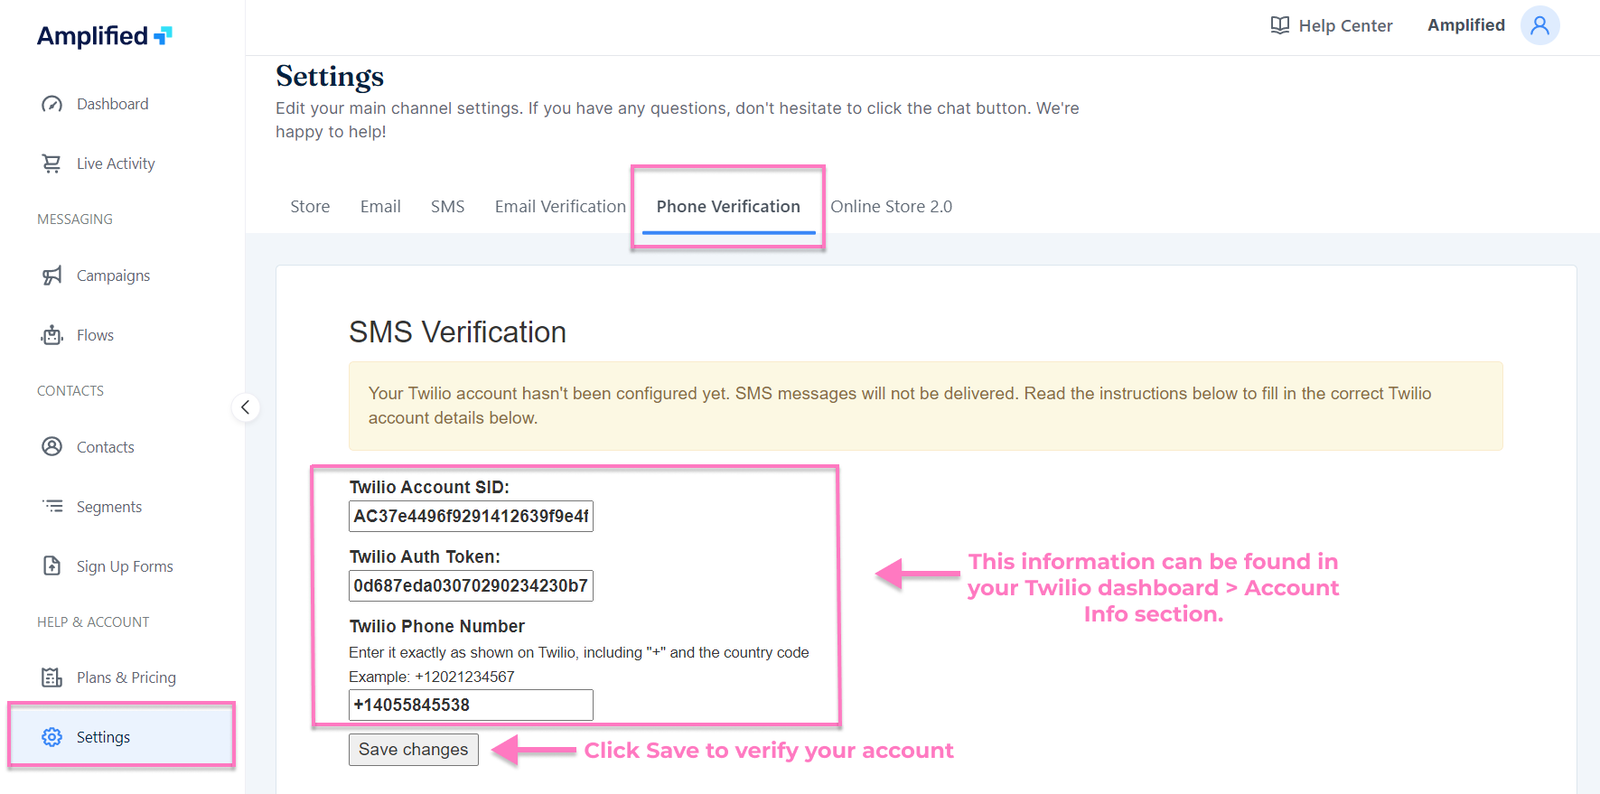
Step 5: Verify SMS Settings in Amplified
- Go to your Amplified Settings page > Phone Verification.
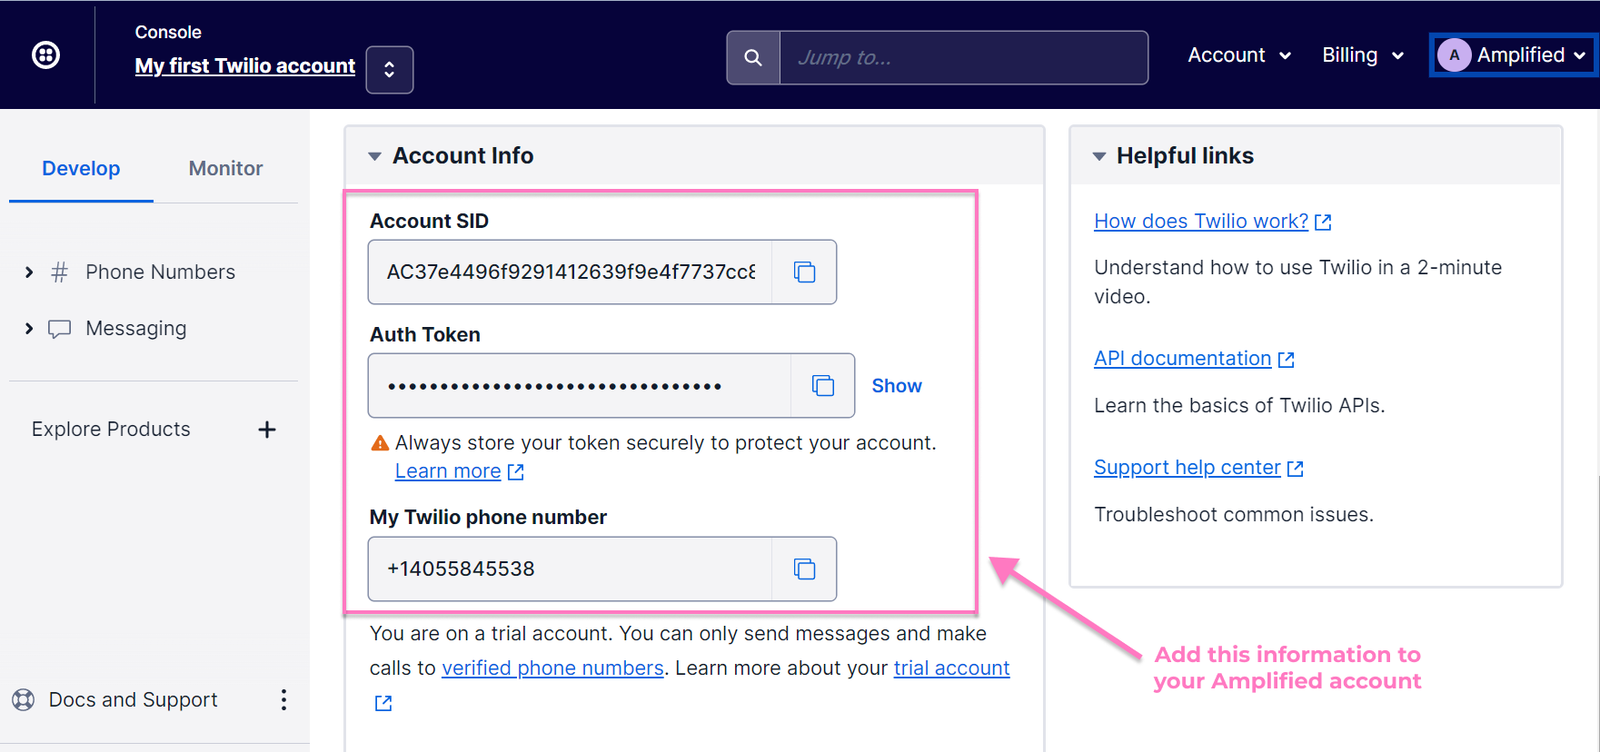
- Add the following information: Twilio Account SID, Auth Token, and phone number. (This can be found in your Twilio dashboard > Account Info section.)
- Click "Save Changes".