Segmenting your email list is one of the most effective ways to improve the success of your email campaigns. By segmenting your list, you can boost open and click-through rates, increase overall engagement, and better understand your customers.
Creating segments in Amplified
Before segmenting your contacts, it's important to determine the criteria you will use to divide them. This can include various information such as demographic data, past purchase history, or email engagement. Once you have identified your criteria, you can use the Segment Builder tool in Amplified to create your segments.
The Segment Builder offers two options for creating segments: utilizing pre-made templates or building a segment from scratch.
Build segments from scratch
Manually segmenting your audience gives you the flexibility to tailor the criteria to fit your specific needs, giving you more control over the recipients of your message. This enables you to craft a personalized customer experience that is both relevant and engaging.
How to create a segment from scratch
To create a segment from scratch, follow these steps:
- From the sidebar menu, select “Segments”.
-
Click “Create Segment” in the upper right corner of the tab.
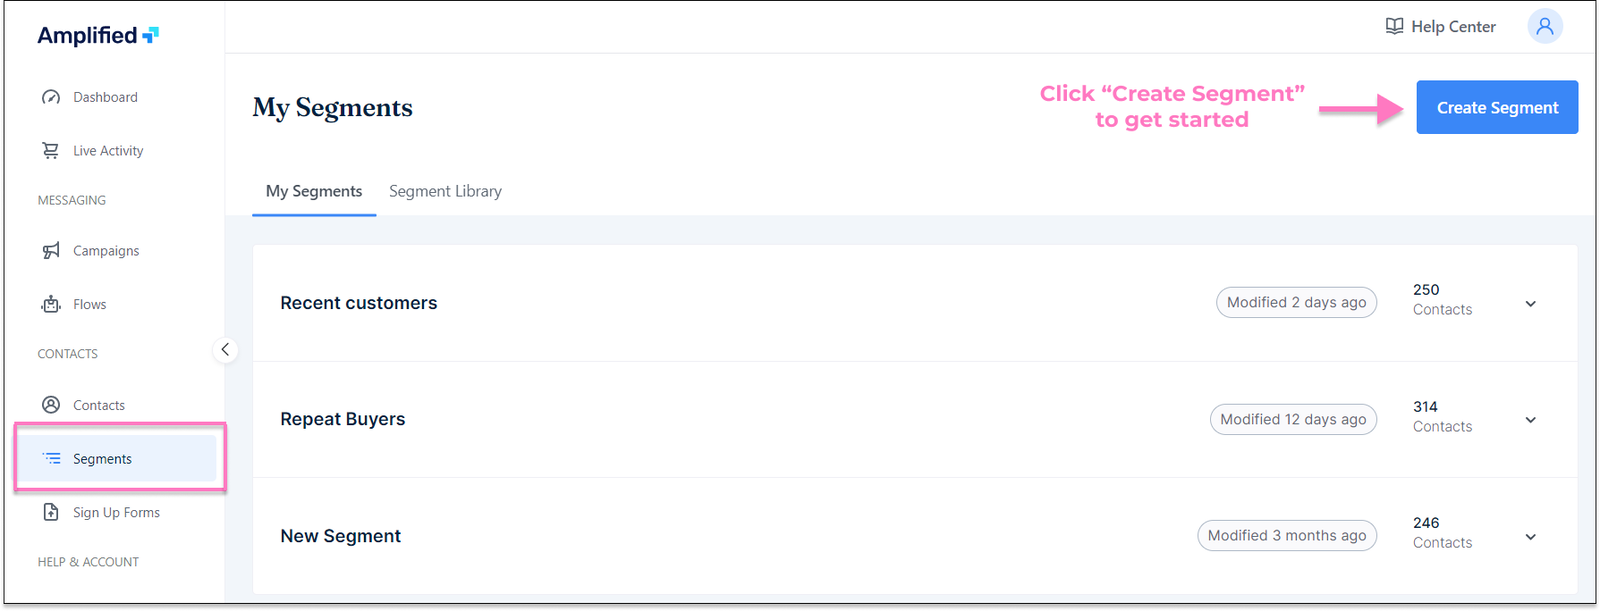
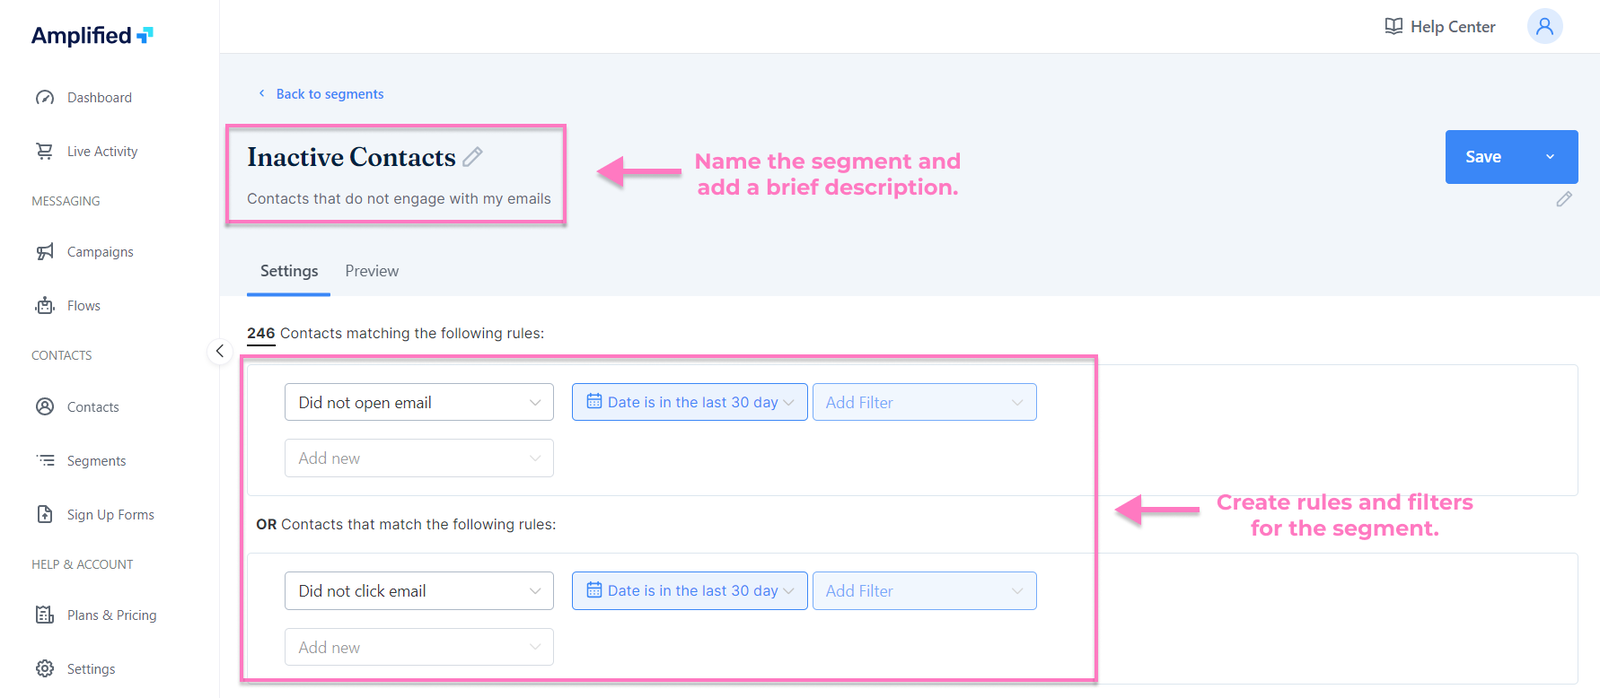
How to navigate to the Segments page and create a new segment - Name your segment and add a brief description.
-
Create rules and filters for your segment.
How to set up a segment - Click on the “Preview” tab to view the contacts that match the rules and filters added.
-
Once you are satisfied with your segment, click “Save”.
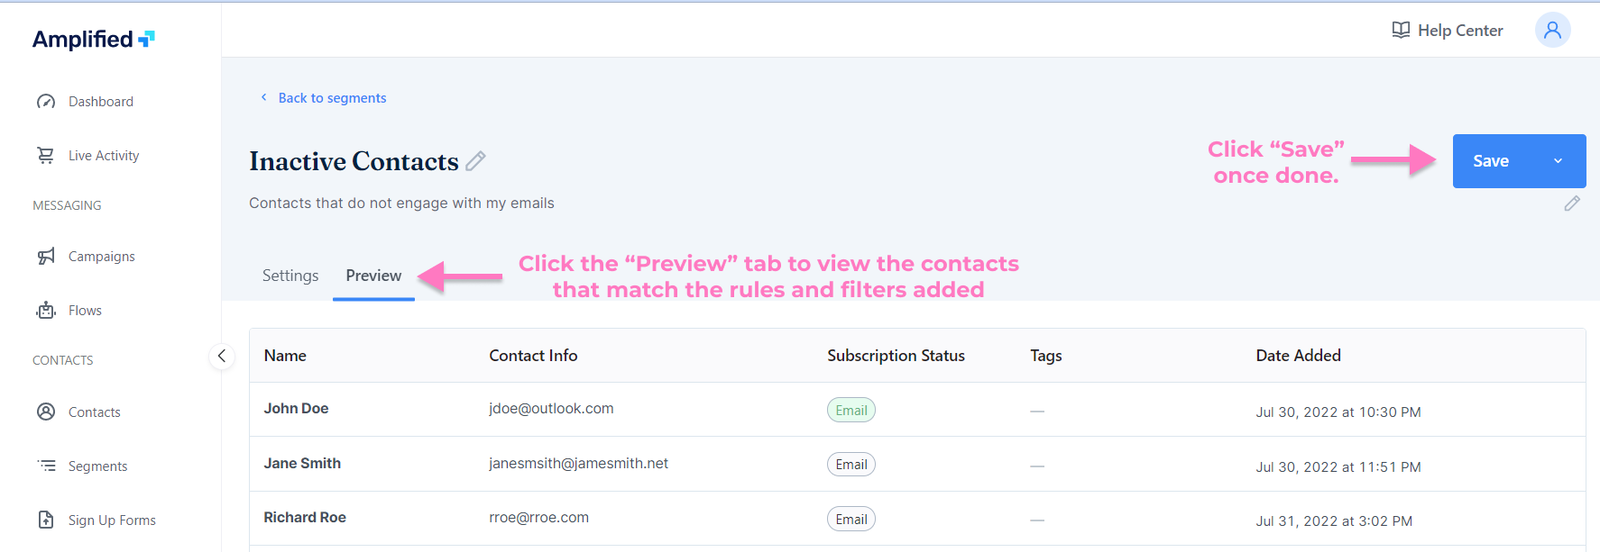
How to preview and save the segment
Use pre-made segments
Our Segment Library contains a growing number of customer segments. These segments are already set up with criteria that you can use to segment your contacts. All you need to do is select the criteria you want, and the template will do the rest. This can save you time and effort in setting up your segmentation, allowing you to start targeting the right contacts right away.
Pre-built segments in Amplified
-
Active email subscribers
A list of email subscribers who have opened a campaign in the last 90 days or signed up in the last 30 days.
-
High-value customers (loyalists)
Customers who are subscribed to your email or SMS notifications or have already made a purchase.
-
Recent customers
Recent customers who have made a purchase on your site.
-
Most engaged email subscribers
Email subscribers who have placed an order in the last 45 days and clicked on a campaign in the last 30 days.
-
Likely to churn
Subscribed customers who haven't purchased for a very long time and is about to become a lost customer.
-
Inactive email subscribers
Email subscribers who have been sent at least 8 campaigns but have not opened any in the past 180 days.
-
Repeat Buyers
Customers who have placed at least 2 orders.
-
VIP Customers
Customers who have placed at least five orders over time and are currently subscribed to email.
-
Unengaged Subscribers
Subscribers who have received an email but have not opened or clicked it in the last 90 days.
-
Customers that need nurturing
Customers who have bought more than once but have not placed an order within the last 15 days.
How to create a new segment using pre-built segments
To create a segment from the Segment Library, follow these steps:
- From the sidebar menu, select “Segments”.
-
Click the “Segment library” tab.
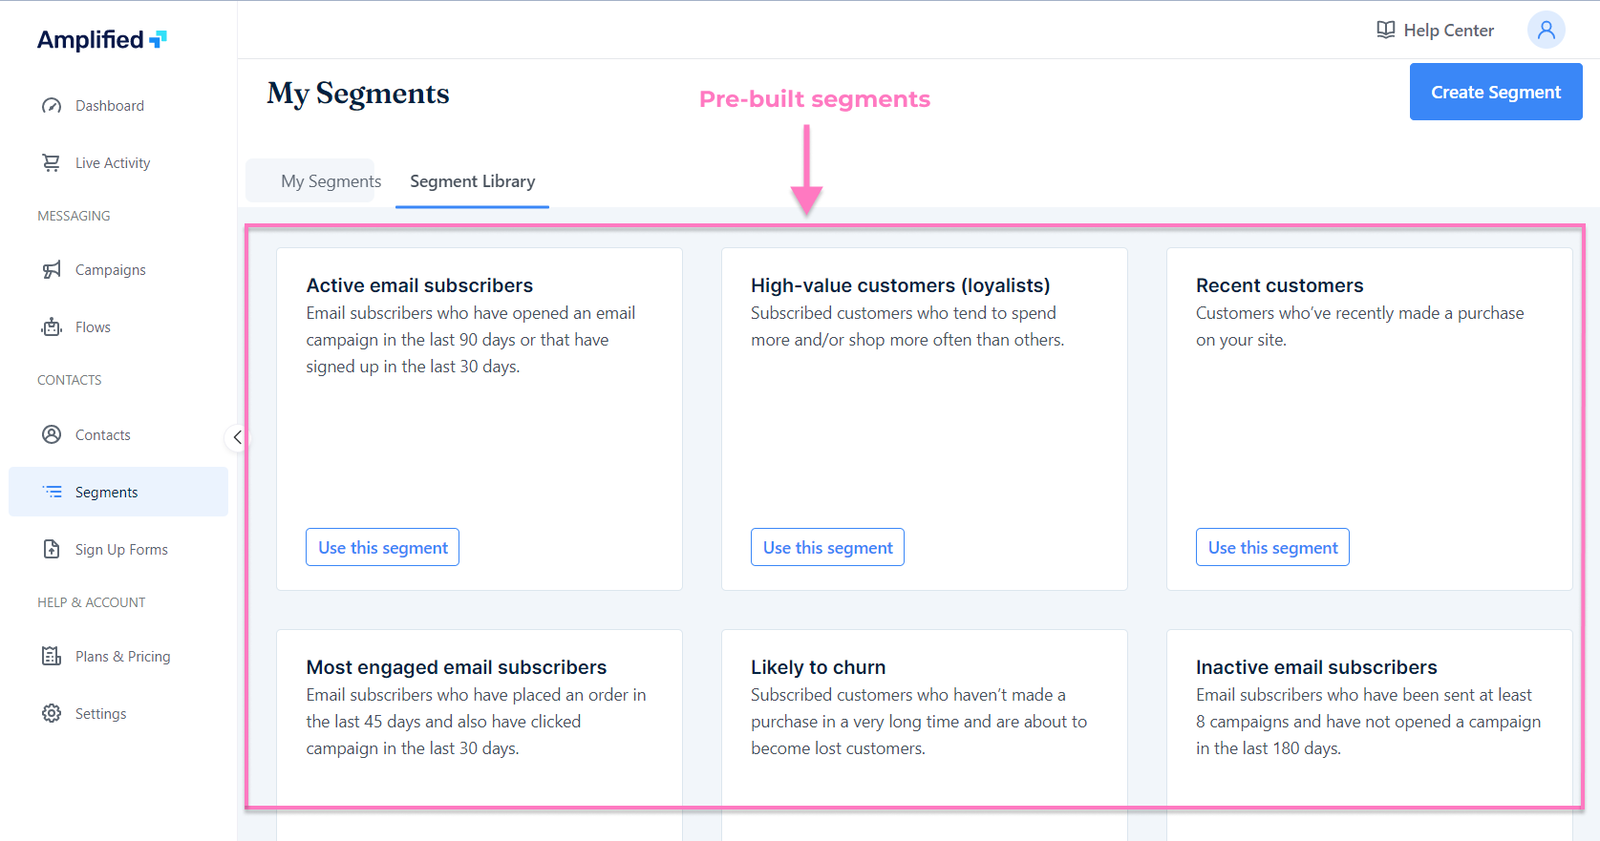
Pre-built segments available in Amplified - Select a template that best describes your target audience. Click the “Use this segment” button to use the template and proceed to the customization tab.
- Customize the template as needed.
- Click on the “Preview” tab to examine the segment you have created.
- Once you're satisfied, head back to the settings tab and click “Save”.
Working with Segments
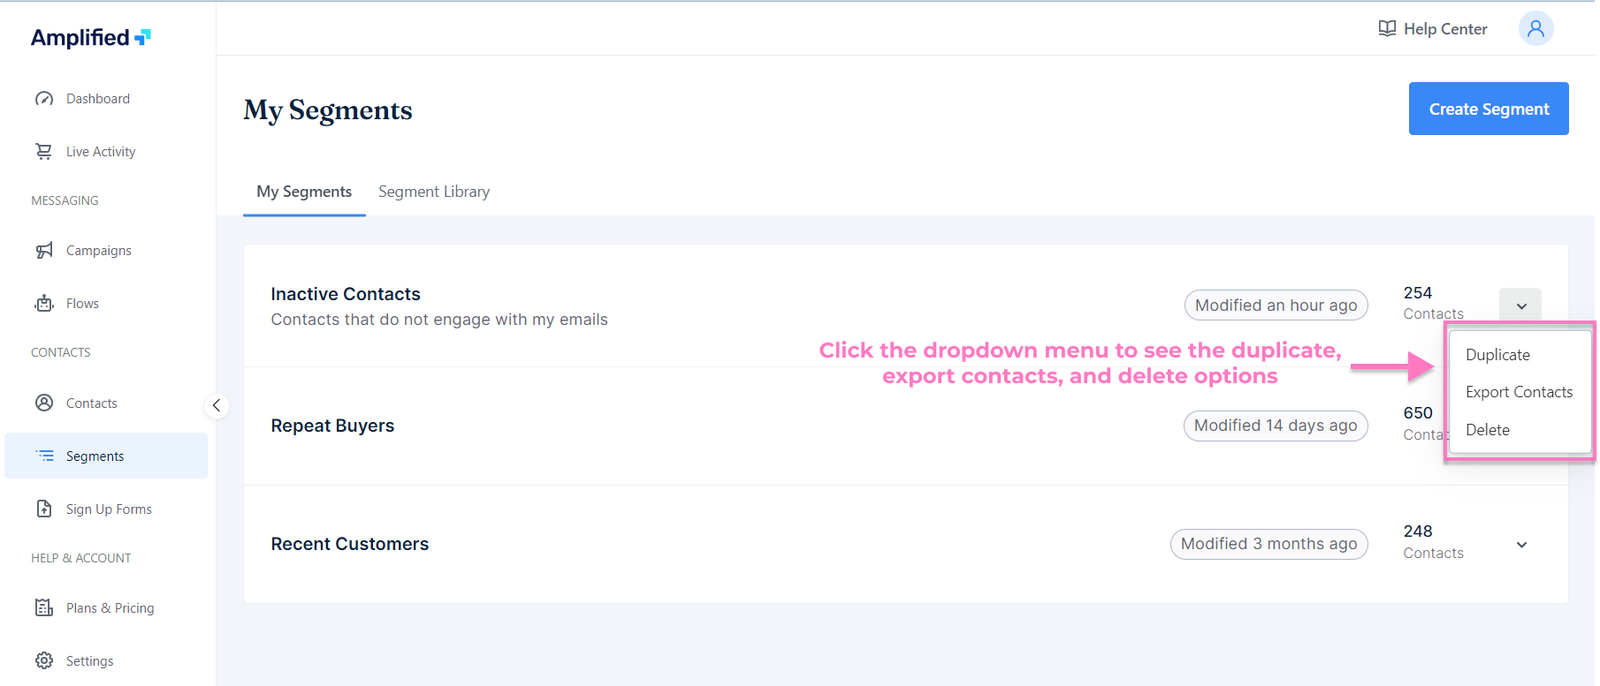
Once a segment has been created, it can be duplicated, deleted, and exported for further use.
Duplicate
Duplicating a segment allows you to create a copy of an existing segment, which can then be modified to suit your specific needs.
Export Contacts
Exporting contacts from a segment allows you to save the segment data to your computer or another external storage device. This can be useful if you wish to share the segment data or use it for further analysis.
Delete
Deleting a segment can be useful if a segment is no longer relevant or if you simply want to clean up your customer data. Keep in mind that once a segment is deleted, it cannot be recovered, so be sure to double-check that you are deleting the correct segment.