Before you start your email marketing campaigns in Amplified, we recommend that you set up DKIM and Return-Path authentication to help protect your business from email-related threats. These email authentication protocols aid in proving your identity as the sender, thereby improving email deliverability.
What is DKIM?
DKIM (DomainKeys Identified Mail) is an email authentication protocol that allows the recipient to confirm that an email was sent and approved by the domain owner.
It uses an encrypted key, known as a digital signature, that verifies that an email has not been tampered with or altered while in transit.
Why is it important to set up your DKIM record?
By setting up your DKIM record, you are putting yourself ahead of your competitors. DKIM provides a strong authentication mechanism that protects against email-related threats such as spam, spoofing, and, of course, phishing.
DKIM-signed emails appear more legitimate to recipients and are less likely to end up in the junk or spam folders. In addition, ISPs use DKIM to establish a reputation for your domain over time.
How to set up DKIM records on your domain?
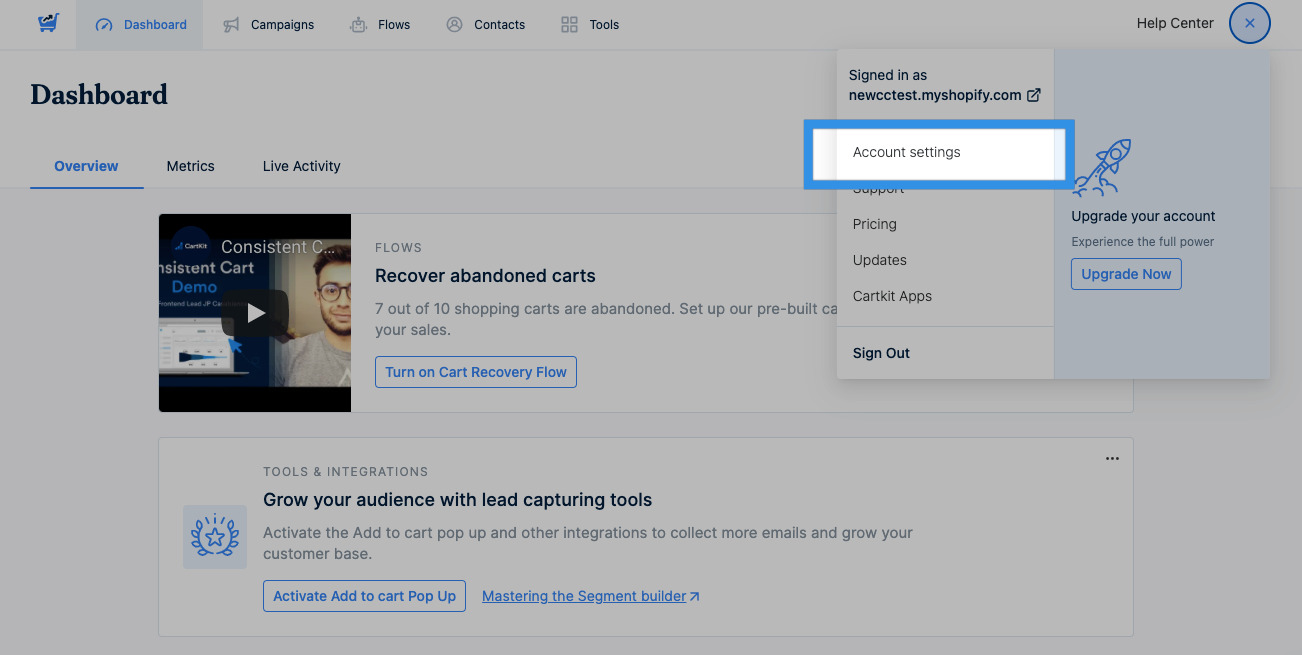
- Navigate to your Amplified Account Settings and select the Email Verification tab.
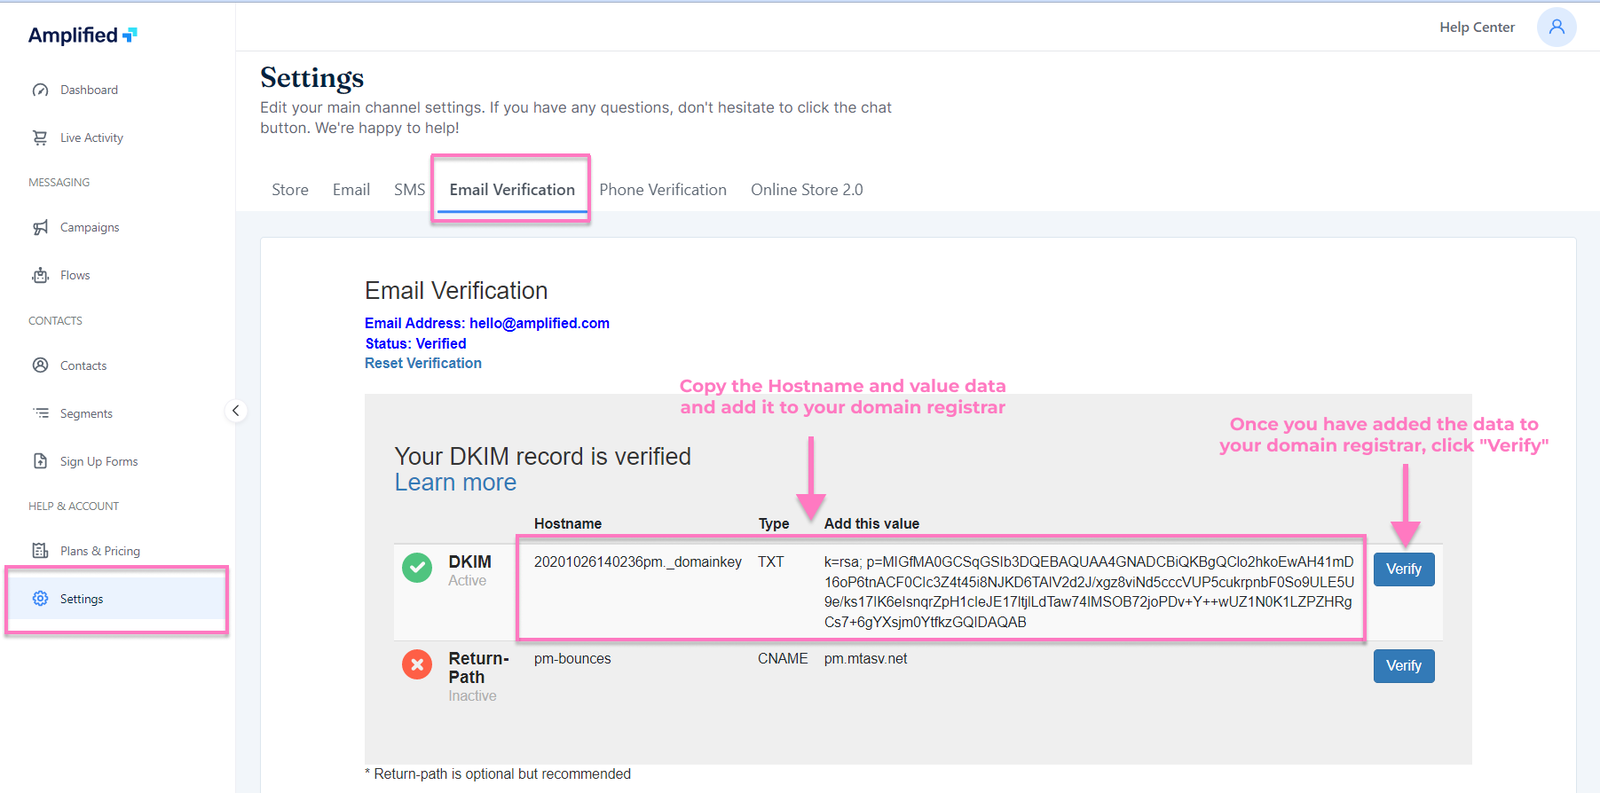
- In the DKIM section, you will find the Hostname and value that needs to be added to your domain registrar.
- Login to your domain registrar account and navigate to the section where you can add new DNS records. (Each hosting service has its configuration options, but the process is always the same.)
-
Enter the Hostname and value provided by Amplified and set the record type to TXT.
Here are some instructions for configuring DKIM records with popular domain registrars:
- Save the changes and wait for the DNS propagation.
-
Go back to Amplified's Email Verification > DKIM section, and click on the Verify button to confirm the DKIM records have been added correctly.
How to navigate to the Email Verification page and verify the DKIM record
What is a Return-Path?
Return-path defines how and where bounced emails will be processed. It is set in the email header and is not visible to the recipient. It's a different SMTP address from the one you send emails from.
Why is it important to set up your Return-Path record?
Apart from its impact on email deliverability and sending reputation, setting up a Return-Path address with your domain registrar is incredibly important when sending bulk emails.
It provides a separate location to store bounce receipts from an email campaign sent to thousands of recipients.
How to set up Return-Path records on your domain?
- Navigate to your Amplified Account Settings and select the Email Verification tab.
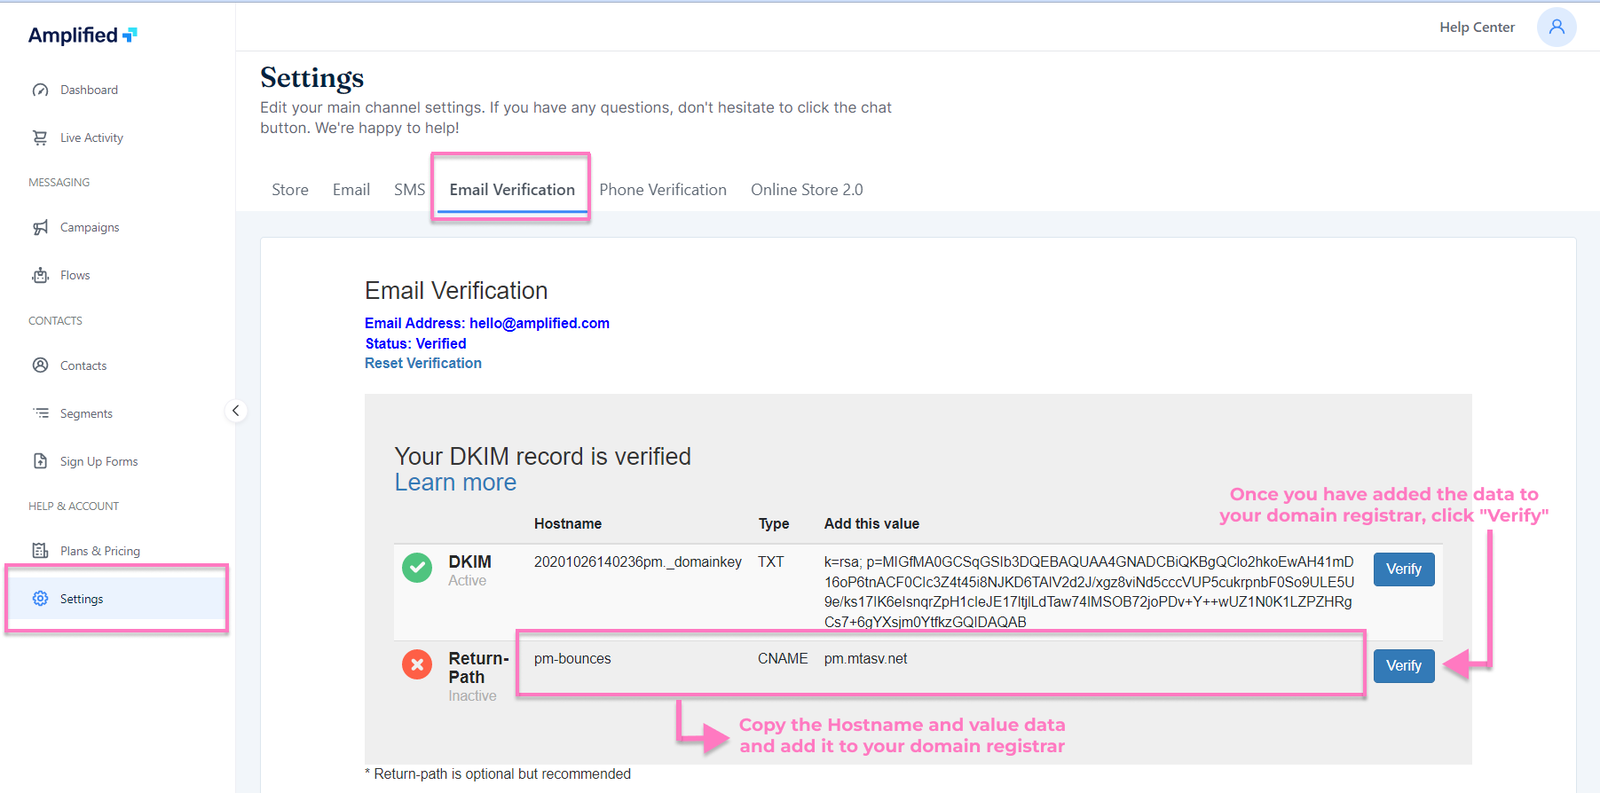
- In the Return-Path section, you will find the Hostname and value that needs to be added to your domain registrar.
- Log in to your domain registrar account and navigate to the section where you can add new DNS records. (Each hosting service has its configuration options, but the process is always the same.)
- Enter the Hostname and value provided by Amplified and set the record type to CNAME.
- Save the changes and wait for the DNS propagation.
-
Go back to Amplified's Email Verification > Return-Path section, and click on the Verify button to confirm the Return-Path records have been added correctly.
How to navigate to the Email Verification page and verify Return-Path record